-
Menu
-
Bundles
-
MOZA Bundles
MOZA R3 & R5 BundlesMOZA R3 bundle PC1,031.71złMOZA R3 bundle XBOX/PC1,243.09złMOZA R5 bundle1,446.34złMoza R5 Truck Bundle1,828.46złMOZA r9 v3 BundlesMOZA R9 V3 and KS Bundle2,009.40zł 2,071.54złMOZA R9 V3 and CS V2P Bundle2,009.40zł 2,071.54złMOZA R9 V3 and RS V2 Bundle2,514.11zł 2,591.87złMOZA R9 v3 & FSR2 Bundle3,539.32zł 3,648.78złMOZA R12 BundlesMOZA R12 v2 and KS Bundle2,372.16zł 2,445.53złMOZA R12 v2 and CS V2P Bundle2,372.16zł 2,445.53złMOZA R12 v2 and RS V2 Bundle2,876.88zł 2,965.85złMOZA R12 v2 & FSR2 Bundle3,902.08zł 4,022.76złMOZA R16v2 and R21 v2 BundlesMoza R16 + Vision GS Bundle4,141.25zł 5,337.35złMoza R16 v2 + Vision GS Bundle4,389.02zł 5,193.50złMoza R16 + CS v2p Bundle3,030.93zł 3,524.34złMoza R16 v2 + CS v2p Bundle3,008.63zł 3,380.49złMoza R21 v2 + VGS5,044.02zł 5,934.15złMoza R21 v2 + Cs v2p3,502.97zł 4,121.14zł
-
SIMAGIC ALPHA Bundles
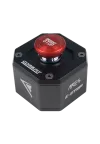
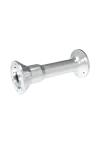
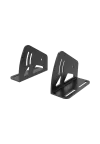
SIMAGIC ALPHA MINI BundlesSIMAGIC ALPHA MINI + GT NEO Bundle2,436.94zł 2,814.02złSIMAGIC ALPHA MINI + GT1 SR Bundle2,572.28zł 2,965.85złSIMAGIC ALPHA BundlesSIMAGIC ALPHA + GT NEO Bundle2,951.97zł 3,870.93złSIMAGIC ALPHA + GT1 SR Bundle2,994.95zł 4,022.76złSIMAGIC ALPHA Ultimate BundlesSimagic Ultimate GTC Bundle4,017.70zł 5,323.58złSimagic Ultimate FX-Pro Bundle4,863.32zł 6,575.61złSimagic Alpha Ultimate GT NEO Bundle3,621.96zł 4,927.84złSimagic Alpha Ultimate GT1 SR Bundle3,757.44zł 5,079.67złSIMAGIC dedicated accessoriesSIMAGIC Quick Release QR50/QR70203.25złSIMAGIC P-STP Killswitch151.13zł 169.01złSIMAGIC Alpha Mounting Brackets186.99zł 201.28złSIMAGIC P-DFT Multifunctional Desk Fixture247.03zł 252.03złSIMAGIC E-15, E-20 Motor Shaft Extender211.49zł 225.49złSIMAGIC T-LOC154.42zł 157.32zł
-
SIMAGIC ALPHA EVO Bundles
SIMAGIC ALPHA EVO SPORT BundlesSIMAGIC ALPHA EVO Sport + GT NEO Bundle2,610.51zł 2,691.25złSIMAGIC ALPHA EVO SPORT + GT1 SR Bundle2,757.80zł 2,843.09złSIMAGIC ALPHA EVO BundlesSIMAGIC ALPHA EVO + GT NEO Bundle3,194.09zł 3,292.88złSIMAGIC ALPHA EVO + GT1 SR Bundle3,341.37zł 3,444.72złSIMAGIC ALPHA PRO BundlesSIMAGIC ALPHA EVO PRO + GT NEO Bundle3,793.44zł 3,910.76złSIMAGIC ALPHA EVO PRO + GT1 SR Bundle3,940.72zł 4,062.60zł
-
CONSPIT ARES BUNDLES
Conspit Ares BundlesConspit Ares + 300 GT + QR3,784.83złConspit Ares + 290 GP + QR4,718.98złConspit Ares + Apex 310 + QR3,531.98złConspit Ares Platinum BundlesConspit Ares Platinum + 300 GT + QR4,614.91złConspit Ares Platinum + 290 GP + QR5,549.06złConspit Ares Platinum + Apex 310 + QR4,362.06złConspit AccessoriesConspit CDP QR273.17złConspit CES E-STOP190.24złConspit ARES 15cm Extension Rod411.38złConspit ARES WheelBase Bracket134.96złConspit Front Mount76.86złConspit CDR QR192.15zł
-
MOZA Bundles
-
Direct Drive
-
MOZA
Moza R9 v31,210.57złMoza R12 v21,584.55złMoza R162,263.86zł 2,663.37złMoza R16 v22,519.51złMoza R21 v23,260.16zł
-
Simagic
SIMAGIC Alpha Mini1,329.37zł 1,706.50złSIMAGIC Alpha1,844.58zł 2,763.41złSIMAGIC Alpha U2,514.54zł 3,820.33złSIMAGIC Alpha EVO Sport1,583.74złSIMAGIC Alpha EVO2,185.37złSIMAGIC Alpha EVO Pro2,803.25zł
-
Simucube
Simucube 2 Sport4,414.63złSimucube 2 Pro5,148.78złSimucube 2 Ultimate11,187.39złSimucube 3 Sport4,715.21złSimucube 3 Pro5,557.21złSimucube 3 Ultimate11,619.60zł
-
VNM
VNM Direct Drive Premier2,438.21złVNM Direct Drive Elite3,137.40złVNM Direct Drive Supreme4,182.93złVNM Direct Drive Xtreme4,812.20zł
-
Conspit
Conspit ARES 122,039.02złConspit ARES Platinum 202,869.11zł
-
Accessories
SQR - Simucube Quick Release302.41złSIMAGIC Quick Release QR50/QR70203.25złMOZA Quick Release194.31złFanatec QR1300.00złFanatec QR2500.00złFanatec QR2 PRO740.00złQ1R Wheelbase side239.70zł 266.33złThrustmaster aluminium adapter81.30złSimucube Mount284.89złSimucube Premium Torque off button565.37złSIMAGIC P-DFT Multifunctional Desk Fixture247.03zł 252.03złMOZA TSW Clamp for Truck Wheel194.31zł
-
MOZA
-
Sim Pedals
-
MOZA pedals
MOZA pedals with other accessories
MOZA RACING Pedals setMOZA SR-P Pedals478.86złMOZA SR-P 3 Pedals Set656.91złMOZA CRP21,381.30złMOZA CRP2 3 Pedal Set1,939.02złMOZA mBooster Active Pedal Set3,820.33złPedals addonsMOZA SR-P Lite Clutch Pedal145.53złMOZA SR-P Clutch Pedal178.05złMOZA CRP2 Clutch381.30złMOZA mBooster Active Pedal3,129.27złMOZA SR-P Accessory Kit64.23złMOZA CRP2 Performance Kit80.49złMOZA CRP2 Long Throttle Plate113.01złSIMAGIC Inversion Kit772.36złMoza pedals hapticsMOZA SR-P for HPR31.71złMOZA CRP for HPR31.71złMOZA CRP 2 for HPR31.71złSIMAGIC P-HPR Haptic231.70zł 260.16złSIMAGIC P-HPR NEO64.23złSIMAGIC P-APS Power Supply100.85złSIMAGIC P2000-HCB Haptic Sensor129.27zł
-
SIMAGIC pedals
SIMAGIC pedals with other accessories
SIMAGIC P500 SeriesSimagic P500722.76złSimagic P500 3p928.99zł 957.72złSIMAGIC P1000 SeriesSimagic P1000 F1,625.20złSimagic P10001,950.41złSimagic P1000 FRS Pedals2,275.61złSimagic P1000i Inverted2,430.08złSIMAGIC P2000 SeriesSimagic P2000 - S100RF2,275.61złSimagic P2000 - L100RF2,356.91złSimagic P2000-R S100R2,722.76złSimagic P2000-R L100R2,113.14zł 2,804.07złHaptics for SIMAGICSIMAGIC P-HPR Haptic231.70zł 260.16złSIMAGIC P-HPR NEO64.23złSIMAGIC P-APS Power Supply100.85złSIMAGIC P2000-HCB Haptic Sensor129.27złSIMAGIC pedals accessoriesSimagic P500 Clutch234.96złSIMAGIC Clutch Pedal For P1000382.11zł 405.69złSIMAGIC Clutch Pedal For P2000592.68zł 771.54złSIMAGIC P2000 Haptic bracket64.14złSIMAGIC P-L200 Long Throttle Plate121.66złSIMAGIC P-L201 Side Throttle Plate41.46zł 48.00złSIMAGIC Inversion Kit772.36złSIMAGIC Rubber Pads & Springs108.99złSIMAGIC pedals accessoriesSIMAGIC P-SRB Sim Ray Bar138.21zł 157.32złSIMAGIC P-SRH Heel Stop284.56zł 318.66złSIMAGIC P-F268 Heel Stop162.60złSIMAGIC P-L100 Long Gas Plate for P1000/P1000i96.90zł 100.44zł
-
SimNet pedals
SimNet pedals with other accessories
SimNet BaseplatesSimNet SP Pro Baseplate367.25złSimNet LED strip39.84złHaptics for SimNetSimNet HPM-L272.00złSimNet HPM-R86.50złSimnet Pedal Tactile Transducer169.00złSimNet Power Supply for Haptics79.00złSimNet AccessoriesSimNet Fanatec cable31.71złSimNet Springs kit89.43złSimNet Bigger Face Plates96.75złSimNet LED strip39.84złSimNet SP-PRO SSK82.00zł
-
HEUSINKVELD pedals
HEUSINKVELD pedals with other accessories
HEUSINKVELD Sprint Pedals set and accessoriesHeusinkveld Sprint1,905.88złHeusinkveld Sprint Pedal Plates87.91złHeusinkveld Elastomer Kit - Sprint121.50złHeusinkveld Sprint Base Plate430.47złHEUSINKVELD Ultimate Pedals set and accessoriesHeusinkveld Ultimate+4,092.96złHeusinkveld Ultimate+ Upgrade Kit760.27złHeusinkveld Ultimate+ Base Plate430.47złOther accessories and hapticsHeusinkveld Sprint for HPR31.71złSIMAGIC P-HPR Haptic231.70zł 260.16złSIMAGIC P-HPR NEO64.23złSIMAGIC P-APS Power Supply100.85złSIMAGIC P2000-HCB Haptic Sensor129.27złHeusinkveld Ultimate+ for HPR31.71zł
- Conspit pedals Conspit hydraulic pedals with other accessories
-
SIMUCUBE pedals
SIMUCUBE pedals with other accessories
SIMUCUBE PRO Pedals setSimucube ActivePedal PRO Set18,329.27złSimucube ActivePedal PRO Set27,635.77złSimucube ActivePedal PRO Set312,732.44złSimucube ActivePedal PRO Set46,421.95złSIMUCUBE Ultimate Pedals setSimucube ActivePedal Ultimate Set 19,667.48złSimucube ActivePedal Ultimate Set 210,351.22złSimucube ActivePedal Ultimate Set 318,044.94złSimucube ActivePedal Ultimate Set 417,343.72złSimucube ActivePedal Ultimate Set of 215,306.50złSimucube ActivePedal Ultimate Set of 322,556.91złOther accessoriesSimucube ActivePedal PRO5,949.59złSimucube ActivePedal Ultimate8,480.49złSimucube Baseplate701.22złSimucube Throttle1,231.53złSimucube Throttle Damper429.50złSimucube Link Hub621.14złTeltonika Ethernet Switch212.11złSimucube ActivePedal for HPR31.71złSimucube ActivePedal PRO for HPR31.71złSimucube Throttle Pedal for HPR31.71złSIMAGIC P-HPR Haptic231.70zł 260.16złSIMAGIC P-HPR NEO64.23zł
-
SRP® pedals
SimRacingPro pedals with other accessories
SRP® Pedals setsSRP Formula-R v53,294.48złSRP GT-R v54,710.64złOther accessories and hapticsSRP Pedal Vibration652.25złSRP Heel Stop300.00złSRP Foot Rest115.75złSRP keys338.00złSRP Invert Kit1,135.66zł
-
Simtrecs pedals
Simtrecs pedals with other accessories
Simtrecs Pedals sets and accessoriesSimtrecs Pro Pedal GT Mark II4,145.53złSimtrecs BasePlate568.29zł
-
Pedals Accessories
Pedals accessories
-
MOZA pedals
MOZA pedals with other accessories
-
Steering Wheels
-
SIMLINE Steering Wheels
High End replicas from our hands
Open Steering WheelsSimline 720s GT32,420.00złSimline Huracan GT32,420.00złSimline GT3-R1,656.00złSimline AMG GT31,941.00złSimline GT3 Cup1,461.00złSimline Corvette C7R2,200.00złButton PlatesSimline BPv3 Lite1,383.00złSimline BPv3 Ultimate1,800.00złButton Plate GT3 Cup894.31złButton plate GT3-R1,282.60złButton box Fiesta WRC966.79złSimline WRC/TCR Button box1,578.00złOnly rimsSimline GT3 Cup D-Shape Rim Suede491.87złSimline GT3 Cup R320 Suede491.87złSimline/Sportline U300 Suede580.00zł
-
MOZA Steering Wheels
Steering wheels from MOZA brand
Open Steering WheelsMoza KS860.98złMoza GS v2P1,381.30złMoza FSR22,438.21złMoza Vision GS2,673.98złMOZA Lamborghini Squadra Corse Essenza SCV124,836.59złMOZA Steering Wheels mods12-inch Round Wheel Mod for MOZA ES259.35złMOZA ES Formula Wheel Mod161.79złMOZA Extension Rod v2413.82złMOZA Wheels accessoriesMOZA Quick Release194.31złMOZA Extension Rod v2413.82złMOZA Base Cover20.33złWheel Holder for MOZA28.46złMOZA Universal Hub Kit169.92zł
-
SIMAGIC Steering Wheels
SImagic Steering wheels and mods
Open Steering WheelsSimagic GT NEO1,107.51złSimagic FX-C1,510.57złSimagic GT41,353.66złSimagic GTC Alcantara1,503.25złSimagic GTC Leather1,462.60złSimagic FX PRO2,348.88zł 2,755.28złClosed Steering WheelsSimagic GT1-SR Alcantara1,300.00złSimagic GT1-SR Leather1,242.98zł 1,259.35złSimagic GT1-D Alcantara1,300.00złSimagic GT1-D Leather1,259.35złSimagic GTS Alcantara1,218.70złSimagic GTS Leather1,182.93złSimagic GT Pro Hub(K) D-Shape Leather1,503.25złSimagic GT Pro Hub(K) Round Leather1,503.25złButton Plates and accessoriesSimagic NEO-X HUB762.60złSimagic GT Pro Hub1,300.81zł 1,569.11złSimagic GT Pro Hub (K)1,239.11zł 1,569.11złSimagic NEO-X Paddle Shifter Module169.05zł 178.05złCover for Simagic Base20.33złWheel Holder for SIMAGIC28.46złOnly rimsSimline GT3 Cup D-Shape Rim Suede491.87złSimline GT3 Cup R320 Suede491.87złSimline/Sportline U300 Suede580.00złSimagic P-325C Alcantara267.48złSimagic P-325D D-Shape Alcantara267.48złSimagic P-330R Round Alcantara267.48zł
-
SIMUCUBE Steering Wheels
Steering wheels from Simucube, best manufacturer of DD wheelbases
Closed Steering WheelsSimucube Tahko GT-21 Wireless Wheel3,005.59złSimucube Valo GT-233,481.52złSimucube AccessoriesSimucube Link Hub621.14złTeltonika Ethernet Switch212.11złSQR - Simucube Quick Release302.41złWall mount for SQR20.00złSimucube lock pin52.59zł
-
CONSPIT Steering Wheels
Conspit Steering wheels and mods
Open Steering WheelsConspit 290 GP2,487.80złConspit MAX 012,765.04złConspit PW16,506.50złConspit 300 GT1,553.66złClosed Steering WheelsConspit Apex 3101,300.80złButton Plates and accessoriesConspit H.AO HUB1,726.83zł
-
Quick Releases and other
High End replicas from our hands
Quick Releases OTHERSQR - Simucube Quick Release302.41złQ1R Wheel side251.06złThrustmaster printed adapter40.65złThrustmaster aluminium adapter81.30złAsetek QR with direct integration400.00złOther accessoriesWall mount for SQR20.00złWheel Holder for MOZA28.46złWheel Holder for SIMAGIC28.46złSIMAGIC P-WMT Wheel Mount48.78zł 92.37zł
-
SIMLINE Steering Wheels
High End replicas from our hands
-
Simracing cockpits
-
Sim chassis
WheelstandsHuzaro Speed 2.0 Wheel Stand202.44zł 324.39złHuzaro Speed 3.0 Wheel Stand283.74zł 568.29złHuzaro Speed 4.0300.00zł 486.99złSimrigsRECART GTR1,572.96złRECART GTRs EVO1,621.70złRECART GTRx EVO2,049.47złRECART REVO2,114.40złRECART REVO Rieger2,313.41złBS Rig Dynamic Frame1,056.10złConspit FP-Lite3,190.35złMonitor and TV StandsHuzaro Speed 9.1 Screen stand381.30zł 405.69złRECART Single monitor/TV stand MS-01504.30złRECART Triple screen stand MTS-01904.45złBS Rig Monitor Stand649.59złSimrigs accessoriesRECART TV mount MS-GTR MS-GTRx365.85złRECART Fourth monitor holder309.37złRECART Keyboard holder KM-01149.75złRECART Direct Drive SC mount56.91złRECART Aluminum rail for GTR / GTRx190.70złRECART DD Front mount GTR/GTRs/GTRx248.61złVESA 100 Mounting spacer18.29złRECART Angle Coupling8.13złT-Nut with Spring Ball1.22zł
-
Bass shakers and haptics
Haptics systemsNext Level Racing HF8 Pro1,056.10złBass ShakersDayton Audio BST-1198.37złDayton Audio BST-2139.02złDayton Audio BST-300EX347.15złDayton Audio TT25 8 Ohm58.54złDayton Audio TT25 16 Ohm58.54złRECART BASS Shaker BS 2.0712.60złAmplifiersNobsound NS-01G PRO156.91złBass Shakers accessoriesMOUNT FOR BST-147.97złMount for Dayton Audio BST-247.97złMount for TT2539.84złMount for NS-01G PRO31.71zł
-
Sim chassis
-
Flight Sim
FFB bases for Flight SimulatorsMOZA AB9 FFB Base1,828.46złMOZA AY210 YOKE2,682.11złMOZA AY210 MFY YOKE BUNDLE3,137.12zł 3,234.15złTake immersion to the next levelMOZA MH16 Flightstick552.03złMOZA MA3X Side Stick308.13złMOZA MFY YOKE552.03złMOZA MTP1,243.09złMOZA MTLP552.03złIncrease the capabilities of your flysimMOZA Z-Axis Module340.65złMOZA Flight Clamp226.83złMOZA Flight Base Mount Adapter104.88złMOZA YS Adapter88.62złMOZA Clamp for AY210 YOKE104.88zł
- Blog
- ON SALE
- BLACK FRIDAY DEALS
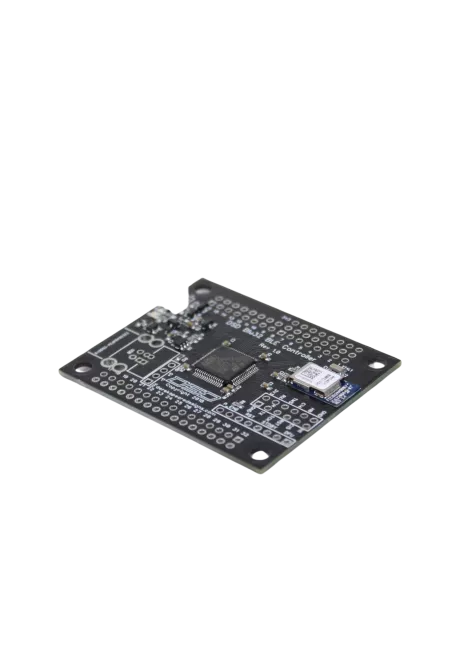
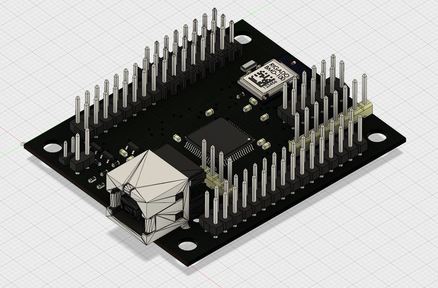
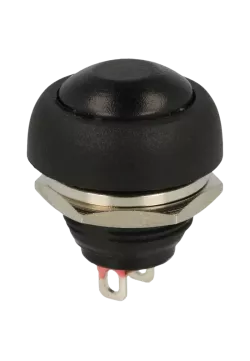
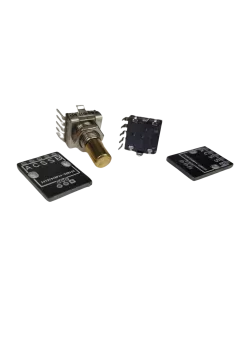
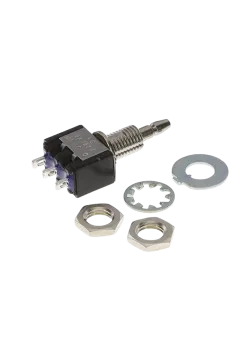
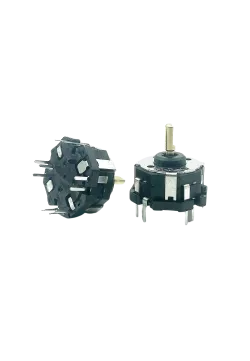
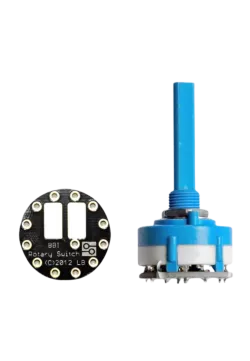
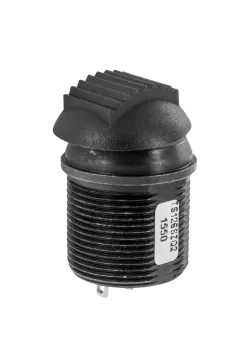
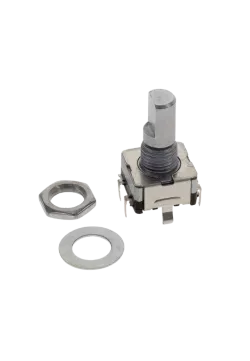
We present to the gaming world the DSD Blu32 BLE Controller! This remarkable device allows you to be FREE OF THE USB cable and connects to your PC via a Bluetooth 4.0 connection. Not only are you free of the USB cable, you are also free to connect rotary encoders, rotary switches, on/off toggle switches, push buttons and up to eight potentiomters to the device as you like. This is a revolutionary device sure to set gaming on the next level.
Ask about product
You will receive an 3.13zł for each item of this product to use on your next purchase.
Close
Shipping within 24 hours
Secure payments
Return within 30 days
Delivery from PLN 0
You might also like
BE ADVISED: If you are looking to integrate this device into an existing or new project or wheel build, it is your responsibility to determine how to accomplish that goal. We do not and cannot advise you on retrofitting, use integration or operational instances due to the unlimited variations of gaming environments across the globe.
We trust each enthusiast using the Blu32 will use his or her own best judgement, ability, skills, needs, wants and goals to successfully integrate the device into their gaming space. We know you will love it once you have it in service!
We trust each enthusiast using the Blu32 will use his or her own best judgement, ability, skills, needs, wants and goals to successfully integrate the device into their gaming space. We know you will love it once you have it in service!
Connecting and Pairing to Host PC
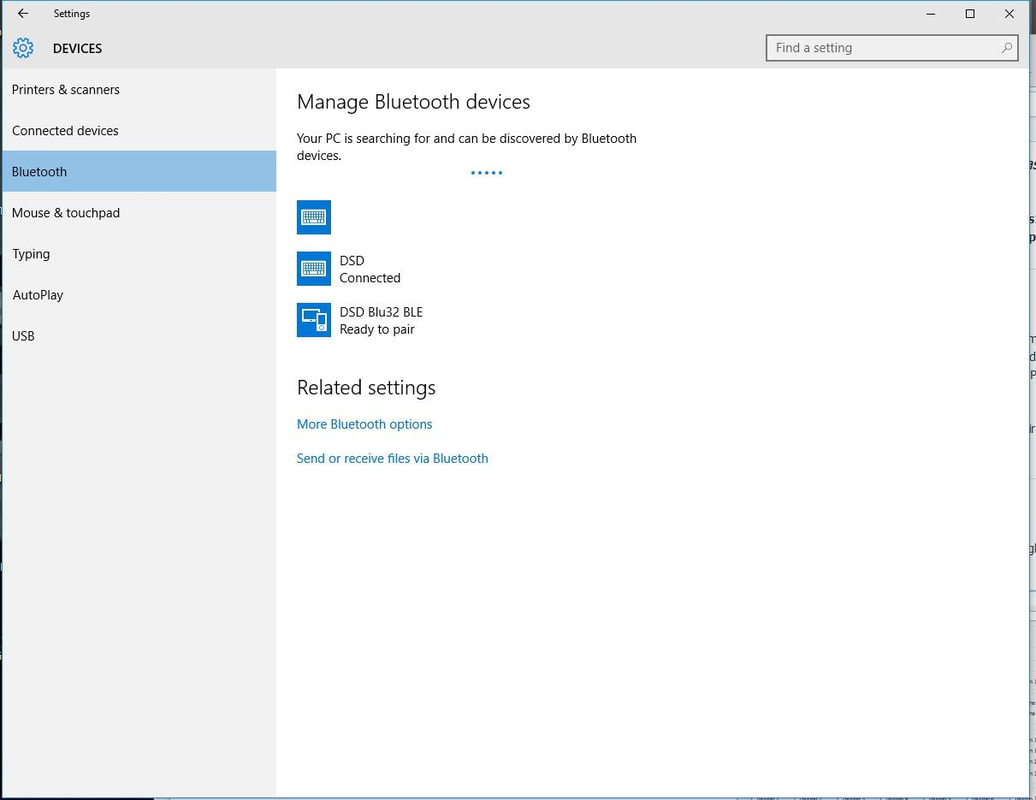
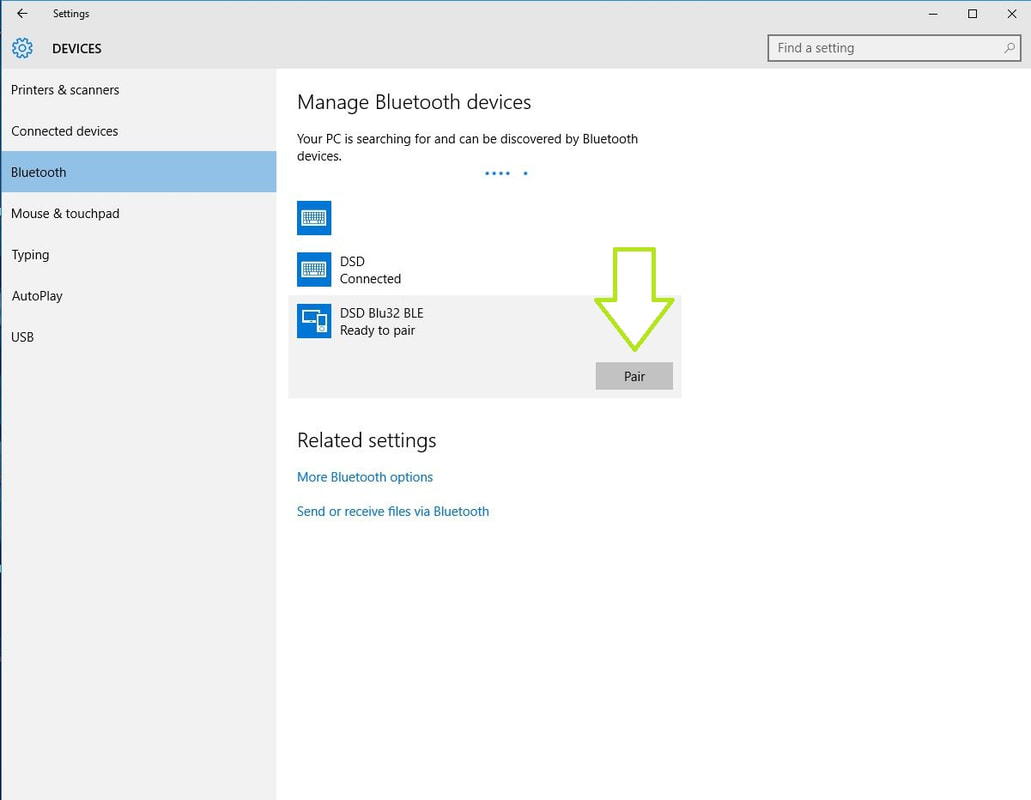
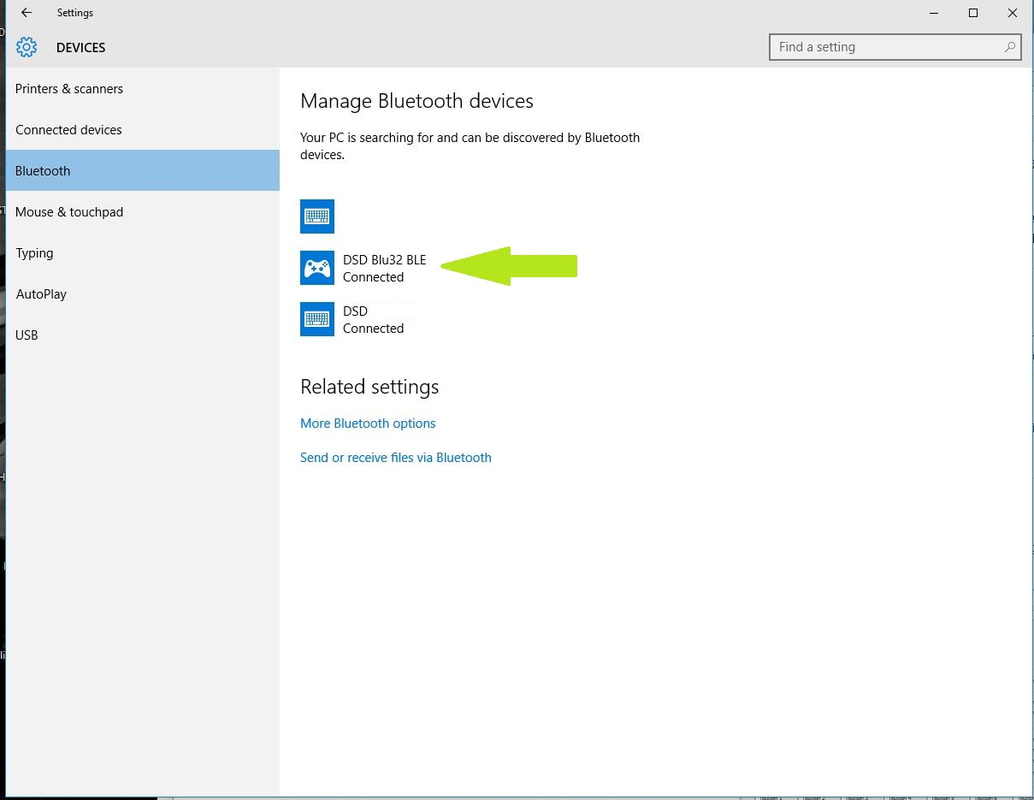
The DSD Blu32 BLE Controller will function with a Bluetooth connection only on Windows 10 PCs and a Bluetooth 4.0 receiver. You may use the device via USB cable on previous versions of Windows if you choose. Ensure that you have a functional Bluetooth 4.0 device installed on your PC and then pair the DSD Blu32 as you would with any other Bluetooth device. You will find it identified as "DSD Blu32 BLE" when your PC searches for ready-to-pair Bluetooth devices. Pair it up and then take off. See the following images below for the pairing sequence.
NOTE: For best performance, connect a fully charged 3.7v Lipo Battery to the device (DO NOT use more than 3.7v Batteries!). You do not need to connect it via USB to pair the device with the host PC. A battery connection is all that is necessary. The device may be paired with a USB cable only as well if you wish.
NOTE: For best performance, connect a fully charged 3.7v Lipo Battery to the device (DO NOT use more than 3.7v Batteries!). You do not need to connect it via USB to pair the device with the host PC. A battery connection is all that is necessary. The device may be paired with a USB cable only as well if you wish.
Configuring the DSD Blu32 BLE Controller
You will need to use the Configuration Tool to configure your device when you connect rotary encoders, rotary switches, on/off toggle switches and potentiometers. The Configuration Tool is simple and intuitive to use. You will download the tool HERE (updated 06 January 2022)
|
Step 1 - Initial Overview:
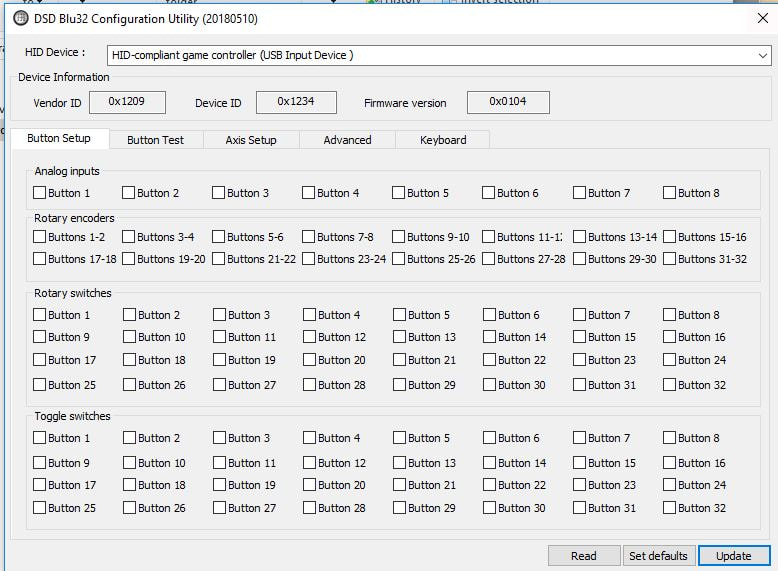
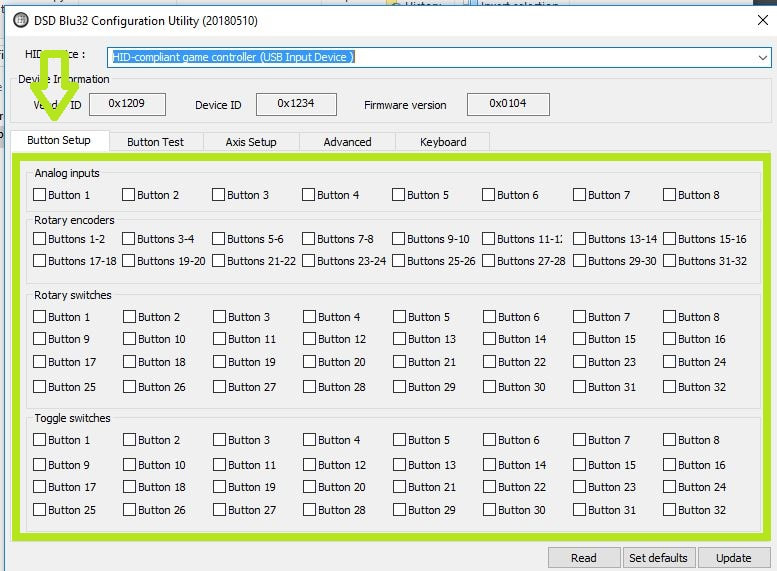
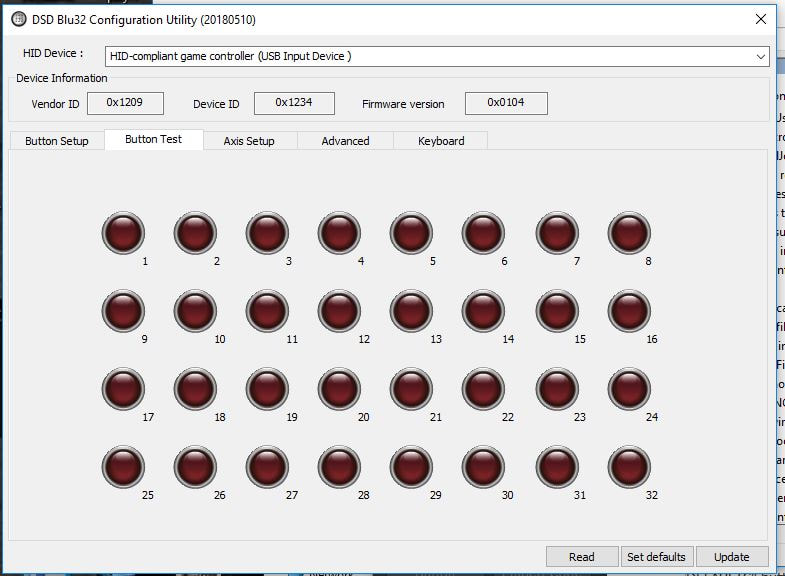
Once you have downloaded the Configuration Tool, connect your DSD Blu32 BLE Controller via USB or Blutooth and open the tool. You will find the name listed in the drop down menu as "HID Compliant Game Controller". This is the Blu32. The interface of the Configuration Tool is simple and easy to use. You will navigate the tool with the tabs named Button Setup, Button Test, Axis Setup, Advanced and "Keyboard". The configuration and testing features of the tool are found under these tabs. |
|
Step 2 - Configuring Components:
You will access the selections under the "Button Setup" tab when connect encoders, potentiometers, etc. to the device. For example, if you connect a potentiometer to Button 1 and an encoder to Buttons 3-4, you will put check marks in the corresponding boxes. You will follow this same process when you connect other components such as rotary switches and on/off toggle switches. Once you have done that, press the "UPDATE" button to save your configuration. NOTE: For best results press the "READ" button when you first connect your device. Once you have done that, press the "SET DEFAULTS" button and then "UPDATE" button to place the device into its default, fully clean state. This ensures an easy initial configuration. Also note that should you reconfigure the device at a later time, you must press the "READ" button so the current configuration is presented to you. You may make any changes after that. |
|
Step 4 - Configuring Analogue Inputs
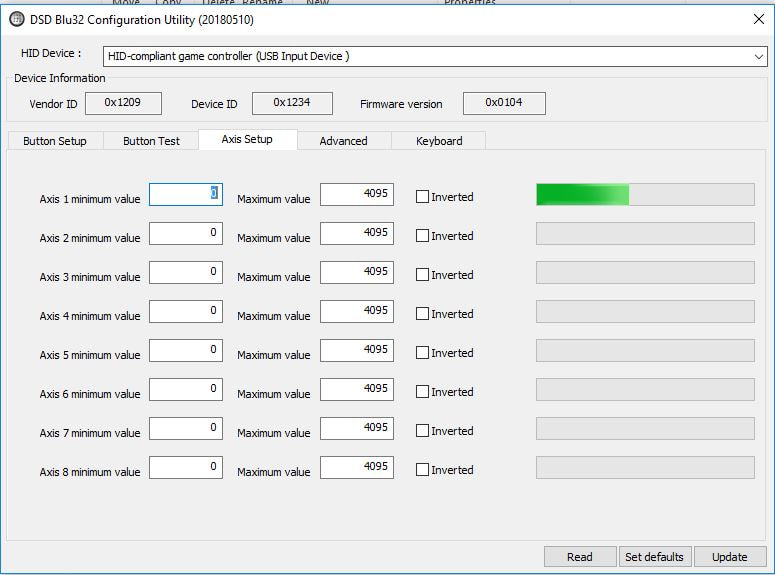
If you wish to connect potentiomers to the device, you can test their behaviour, scale and adjust the usable range as well as invert their axis inputs as needed. If you wish to scale and adjust the rages, you will do that by changing the values in the minimum and maximum value fields. Please a chack in the box if you wish to invert the direction. Once you have the analogue settings as you find best, press the "UPDATE" button to save the changes. |
|
Step 5 - Adjust Polling, etc:
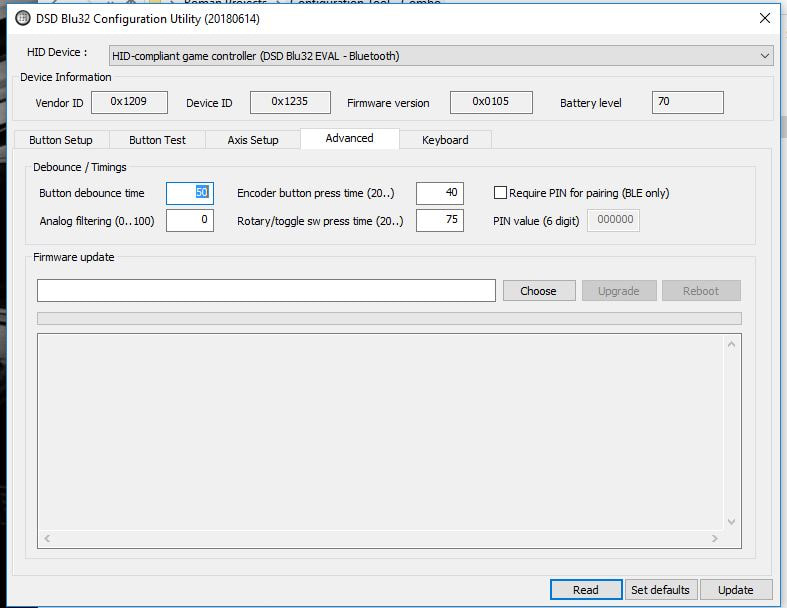
Access the "Advanced Tab" to make any changes to the button debounce timing, analogue channel smoothing, encoder press time and rotary/toggle switch press time.
Pro Tip: Remember to press the "UPDATE" button when making any changes to any values! |
Notes - will populate when necessary
|
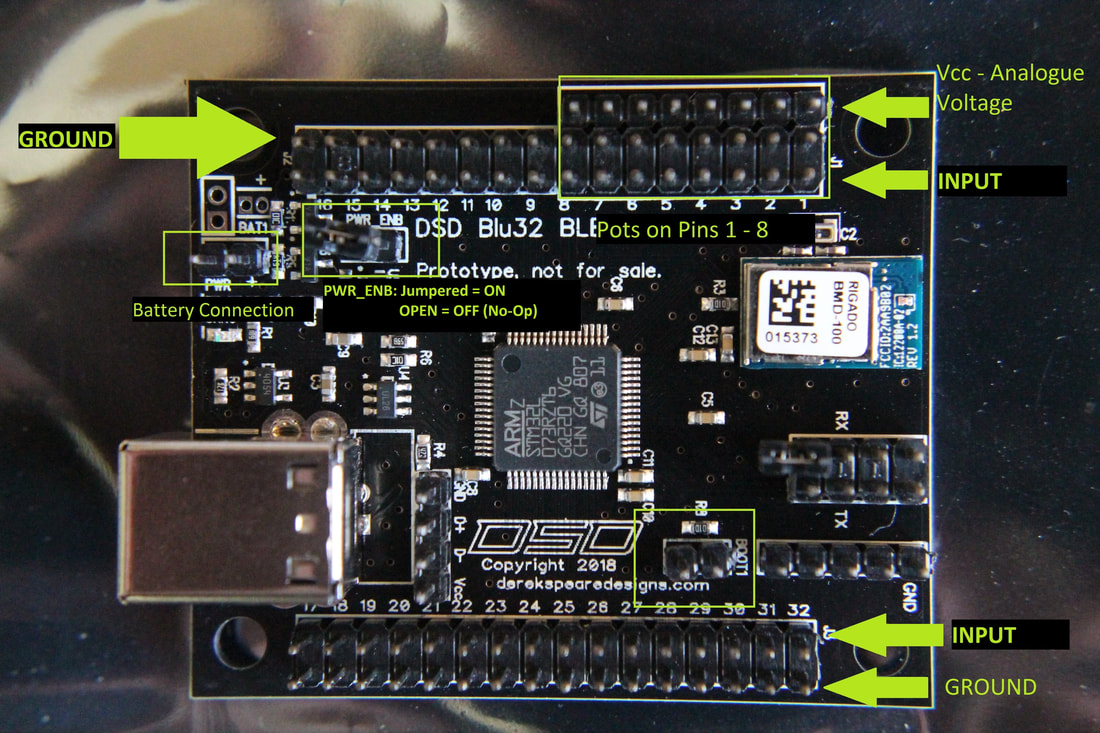
Physical Dimensions and Connection Diagrams:
The DSD Blu32 Device measures as follows:
|
dsd_blu32
No reviews
Manufacturer
- Simline
- Nakielska 89
- 85-347 Bydgoszcz
- Poland
- info@simline.eu
- +48517768318
Responsible person
- Sim-Center Sp Z o.o.
- Garbary 100/164
- 61-757 Poznań
- Poland
- salon@sim-center.pl
- +48602214221
You might also like


